TikTok Drumming

Look ma, I’m a TikTok star, or at least trying to be. Not really.

“Guess this song by its Drum Track.”

During the pandemic, when I couldn’t practice with my band, I played around with playing drum parts to some famous songs and posting them on Instagram and Facebook. It was a fun game and a good excuse to spend some time behind the drum kit, but I shelved the idea after a month.

This winter I decided to pick it back up to experiment with short-form video sharing on Instagram Reels, YouTube Shorts, and TikTok. Now, over fifty videos later, I’ve learned a lot about reproducing drum tracks and these video-sharing platforms.

Drum Sticks on a Snare Drum

Choosing and Recording the Track

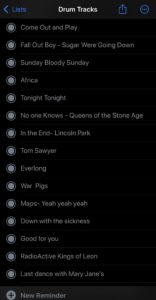
Not just any song can work for “Guess this”. The song needs to be relatively popular and have a distinctive beat or groove that can be recognized by non-drummers. That’s proven to be easier said than done, especially with songs within the last decade. As rock has been dying out, current pop songs are produced beats that simply repeat the same two measures. Using the iOS reminders app, I’ve put together a running list using my iOS reminders app of primarily rock songs over the last 50 years, and add to it as I encounter them.

My list of drum tracks

I’ve recorded my share of drum tracks, where I pay homage and offer my interpretation of the song. Approaching these songs, however, requires me to be faithful as possible to the original recordings, trying to emulate them to the best ability. Also, unlike a drum cover, I don’t need to nail the whole song, just aim for a solid 40-60 second segment for the video.

I do have to admit to cheating a bit: I load the original song into the Digital Audio Workstation (DAW) and record my take alongside the regular drum track. It helps keep me in check and enables me to compare the two parts. While I’m doing that, I load the track into the Moises App which enables me to break down the different instruments and create a drumless track. I then export the track back into the DAW, align it with the original then export the rendered track with my drums, followed by exporting a “drums only” track with the drums muted. All the while, I have my phone on the tripod, taking a video of the performance.

Once I have my footage, I import them into Adobe Premiere, line up the audio, and look for that distinctive 45-60 second clip I can use. I then find a point about 30-40 seconds into the song where I can transition from the “drums only” clip to reveal the song. After applying an audio fade between the tracks, I export the video and get it back onto my phone using OneDrive.

Posting the video

At this point, I have a rendered video with the final audio, but I now need to insert the clues. I’ve made it a point to use each video platform’s editing tools to apply the text, as I’ve read that videos are exported at a lower quality having the watermark can make the video perform worse.

Starting with Instagram, I import the video and get to work on the text.

  • The title: “Guess this song by its drum track.”
  • The year it was released
  • The genre – I usually get this from the Wikipedia entry
  • A hint, usually retrieved from SongFacts

After setting up the text, I set the duration, starting with the hint so that it appears for 8-10 seconds before the full song kicks in. I then work my way backward, setting the genre and release year around 5 seconds each. I leave the title up but have it disappear once the song is revealed. Before I move to the next screen, I copy the hint into Clipboard++ so that I can use it in the other apps. I go to the posting screen and set my title to “Guess this song by its drum track: “, increment the number, add some tags, then publish the video out into the world.

I then go to TikTok and Youtube and repeat the above steps.

Lessons I’ve Learned

These video platform algorithms are complete crapshoots, but I’ve noticed some trends in each platform:

  • Instagram has shown the most variance in my performance. My floor has around 250 views, my average is between 800-1000 views, and I’ve had a handful of videos go over 10k views (my highest being 14.4k). I also share the Reel on Facebook and those views tend to be in the 100-500 range.
  • TikTok has the lowest number of views, but the highest number of likes and comments. As far as views, I have videos that haven’t reached 100 views, but most tend to top out between 250-300. My highest-viewed video was at 2,200.
  • YouTube Shorts is the quickest to accumulate views but always tops out below 1,500. I’ve had a few videos that are duds out of the gate, at less than 40 views. The comments on YouTube are the meanest by far.

As far as video posting mobile apps, YouTube has the best editor for what I’m doing (which is quickly setting durations of text layers). Instagram’s Reels interface had the steepest learning curve, especially when it comes to setting durations.

My videos seem warmly received, for the most part. As I mentioned, YouTube commenters are especially critical, which increases with the popularity of the song. I’ve learned to simply remove the mean comments and not even warrant a response, but I swear that as soon as I remove a comment, YouTube slows down the view exposure.

I was worried that I would run out of songs, but after doing this for over 4 months, the number of songs on my “ToDo” list outnumbers the ones I’ve done. At this point, I’ve found this to be a really fun way to improve my drumming and play in this video space. It’s been a great outlet and I’m looking forward to the next 50!

Whether you use TikTok, Instagram, or YouTube shorts, I’d love for you to check out my videos and see how many you can get! I’m also taking song suggestions as well!

I don’t know how to fix Twitter

I don’t know how to fix Twitter

Nearly four years ago, I wrote How To Fix Twitter, suggesting that Twitter needed to make verification available for everyone for a nominal fee, then enable users to toggle “Verified” notifications to fix most of the interaction. In an extremely chaotic way, we’ve watched this play out and as it turns out Twitter remains just as toxic as ever and after losing a majority of its advertisers, this Titantic seems destined for the iceberg.

Where did I go wrong?

The problem is that people still see the Blue Checkmark as a status symbol of social validity, rather than actual verification. Twitter, still treating it as a status symbol, is now simply charging a tax for it. Given all the stories about fake accounts becoming verified, Twitter hasn’t bothered doing the verification. Given their massive layoffs, they don’t seem staffed to be able to verify anyone. To make matters worse, Twitter is now rolling out different classifications of verifications: gold for organizations (such as media outlets), and grey for government agencies. With more colors possibly on the way, the value of the blue checkmark is simply getting inflated.

I remain convinced that performing due diligence on verification could go a long way to fix the toxicity of Twitter and disincentivizing behavior from trolls and fake accounts. A transparent verification process – such as a government-issued ID, and disclosing the type of ID that was used in verification – would build up trust in the checkmarks.

With all that said, Twitter seems bent on a death spiral.

Recently they turned on the third-party clients in which Twitter’s ascendence was built, by blocking access to their API. Third-party clients are responsible for many of the features Twitter takes for granted, with Twitter’s own client being an acquired third-party client. Aside from technology, many of Twitter’s oldest and most enthusiastic users accessed the service through third-party clients. My guess is that Musk and Twitter leadership gutted the API team and saw this as a convenient opportunity to do away with the clients.

Twitter is cutting itself off at the knees with this decision. From the news I’ve read, it doesn’t seem that incorporating verification into Twitter Blue moved the needle on their subscriptions. With advertisers leaving in droves, Twitter’s API could have been a source of revenue for subscribers by requiring Twitter Blue in order to use a third-party client. However, it’s apparent that the API was likely lobotomized and won’t ever be back.

I’m still using Twitter, begrudgingly, but am finding myself using Mastodon more and more. After Tweetbot was shut down, the developers created Ivory. Using that client has unlocked the joy I’ve lost from using Twitter.

I’d love for you to come hang out with me on that platform if you’d like – mastodon.world/@jeromey

Our Winter Break Project – A RetroPie Arcade

Our Winter Break Project – A RetroPie Arcade

This has been quite a different winter break for us, hunkering down and lying low for Christmas and New Years’, but we found the perfect project to keep our family busy – constructing our own arcade cabinet!

I’ve had RetroPie loaded onto my Raspberry Pi hanging around for three years, but we thought this would be a fun way to showcase these classic games, plus combine Bethany’s developing woodworking skills with a fun tech project.

I found some great plans over at The Geek Pub that we purchased for $5. I’m going to defer to The Geek Pub’s post for the details on materials and items, but wanted to share our experience in putting things together.

We split the work into three days: cutting (Day 1), assembling/drilling (Day 2), painting and final assembly (Day 3).

Day 1 – Cutting

We started by tracing out the side panels as one continuous piece. After cutting the first side, we used it as a stencil for the second side, then went through and cut the back, top, bottom, and interior panels. Cutting took the better part of the afternoon, but we managed to fit all of our pieces by evening.

Day 2 – Outer Assembly & Control Panel

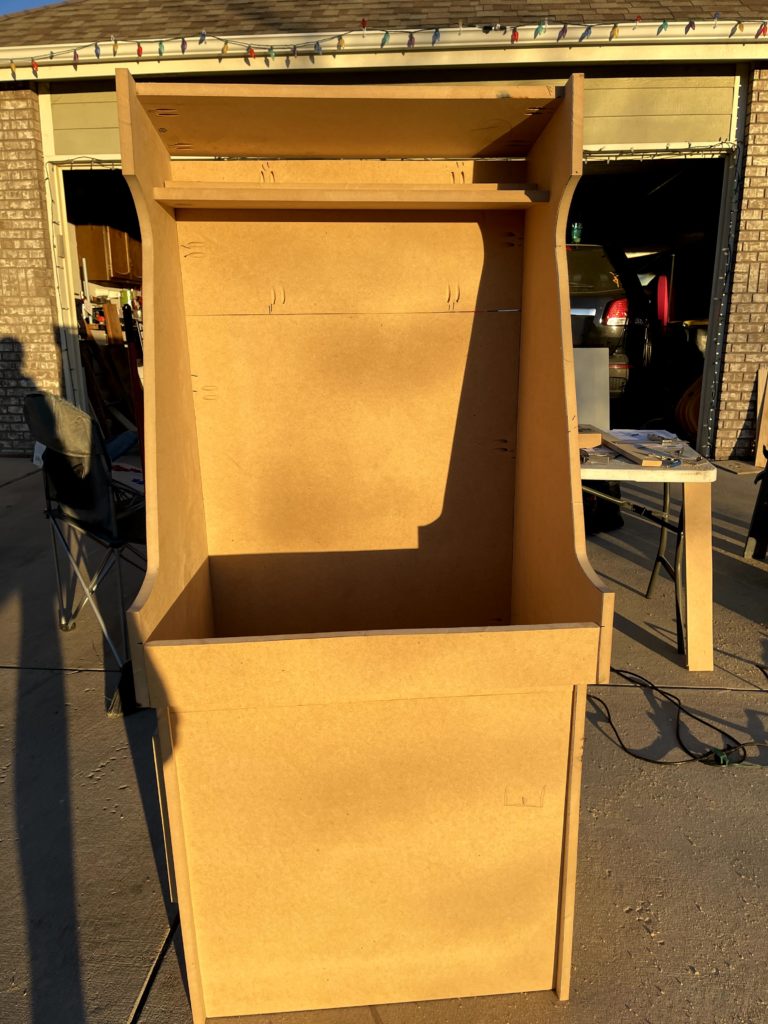
With all our pieces cut, we spent the next morning doing all the assembly. Bethany got to use her new pocket-hole kit so that we could assemble it from the inside. We started by assembling the sides to the back, then the exterior panels, starting from the bottom and working our way up.

While Bethany was working through the panel assembly, I got to work on the control panel. We used the hole saw to drill the 22 holes in the panel (we actually had to use the backup cut, as we hit a snag the first time around). We actually got a 1/2″ thick piece of plywood for the panel to better tighten the buttons. Once the holes were drilled, the girls and I set to work on installing all the buttons and the joysticks. We then connected all the ribbon cables to the USB controller. This ended up taking more time than expected, but looked really cool when we were done.

At the end of day two, we had the arcade casing assembled and saw the end of the project in sight!

Day 3 – Final Assembly, Painting and Moving

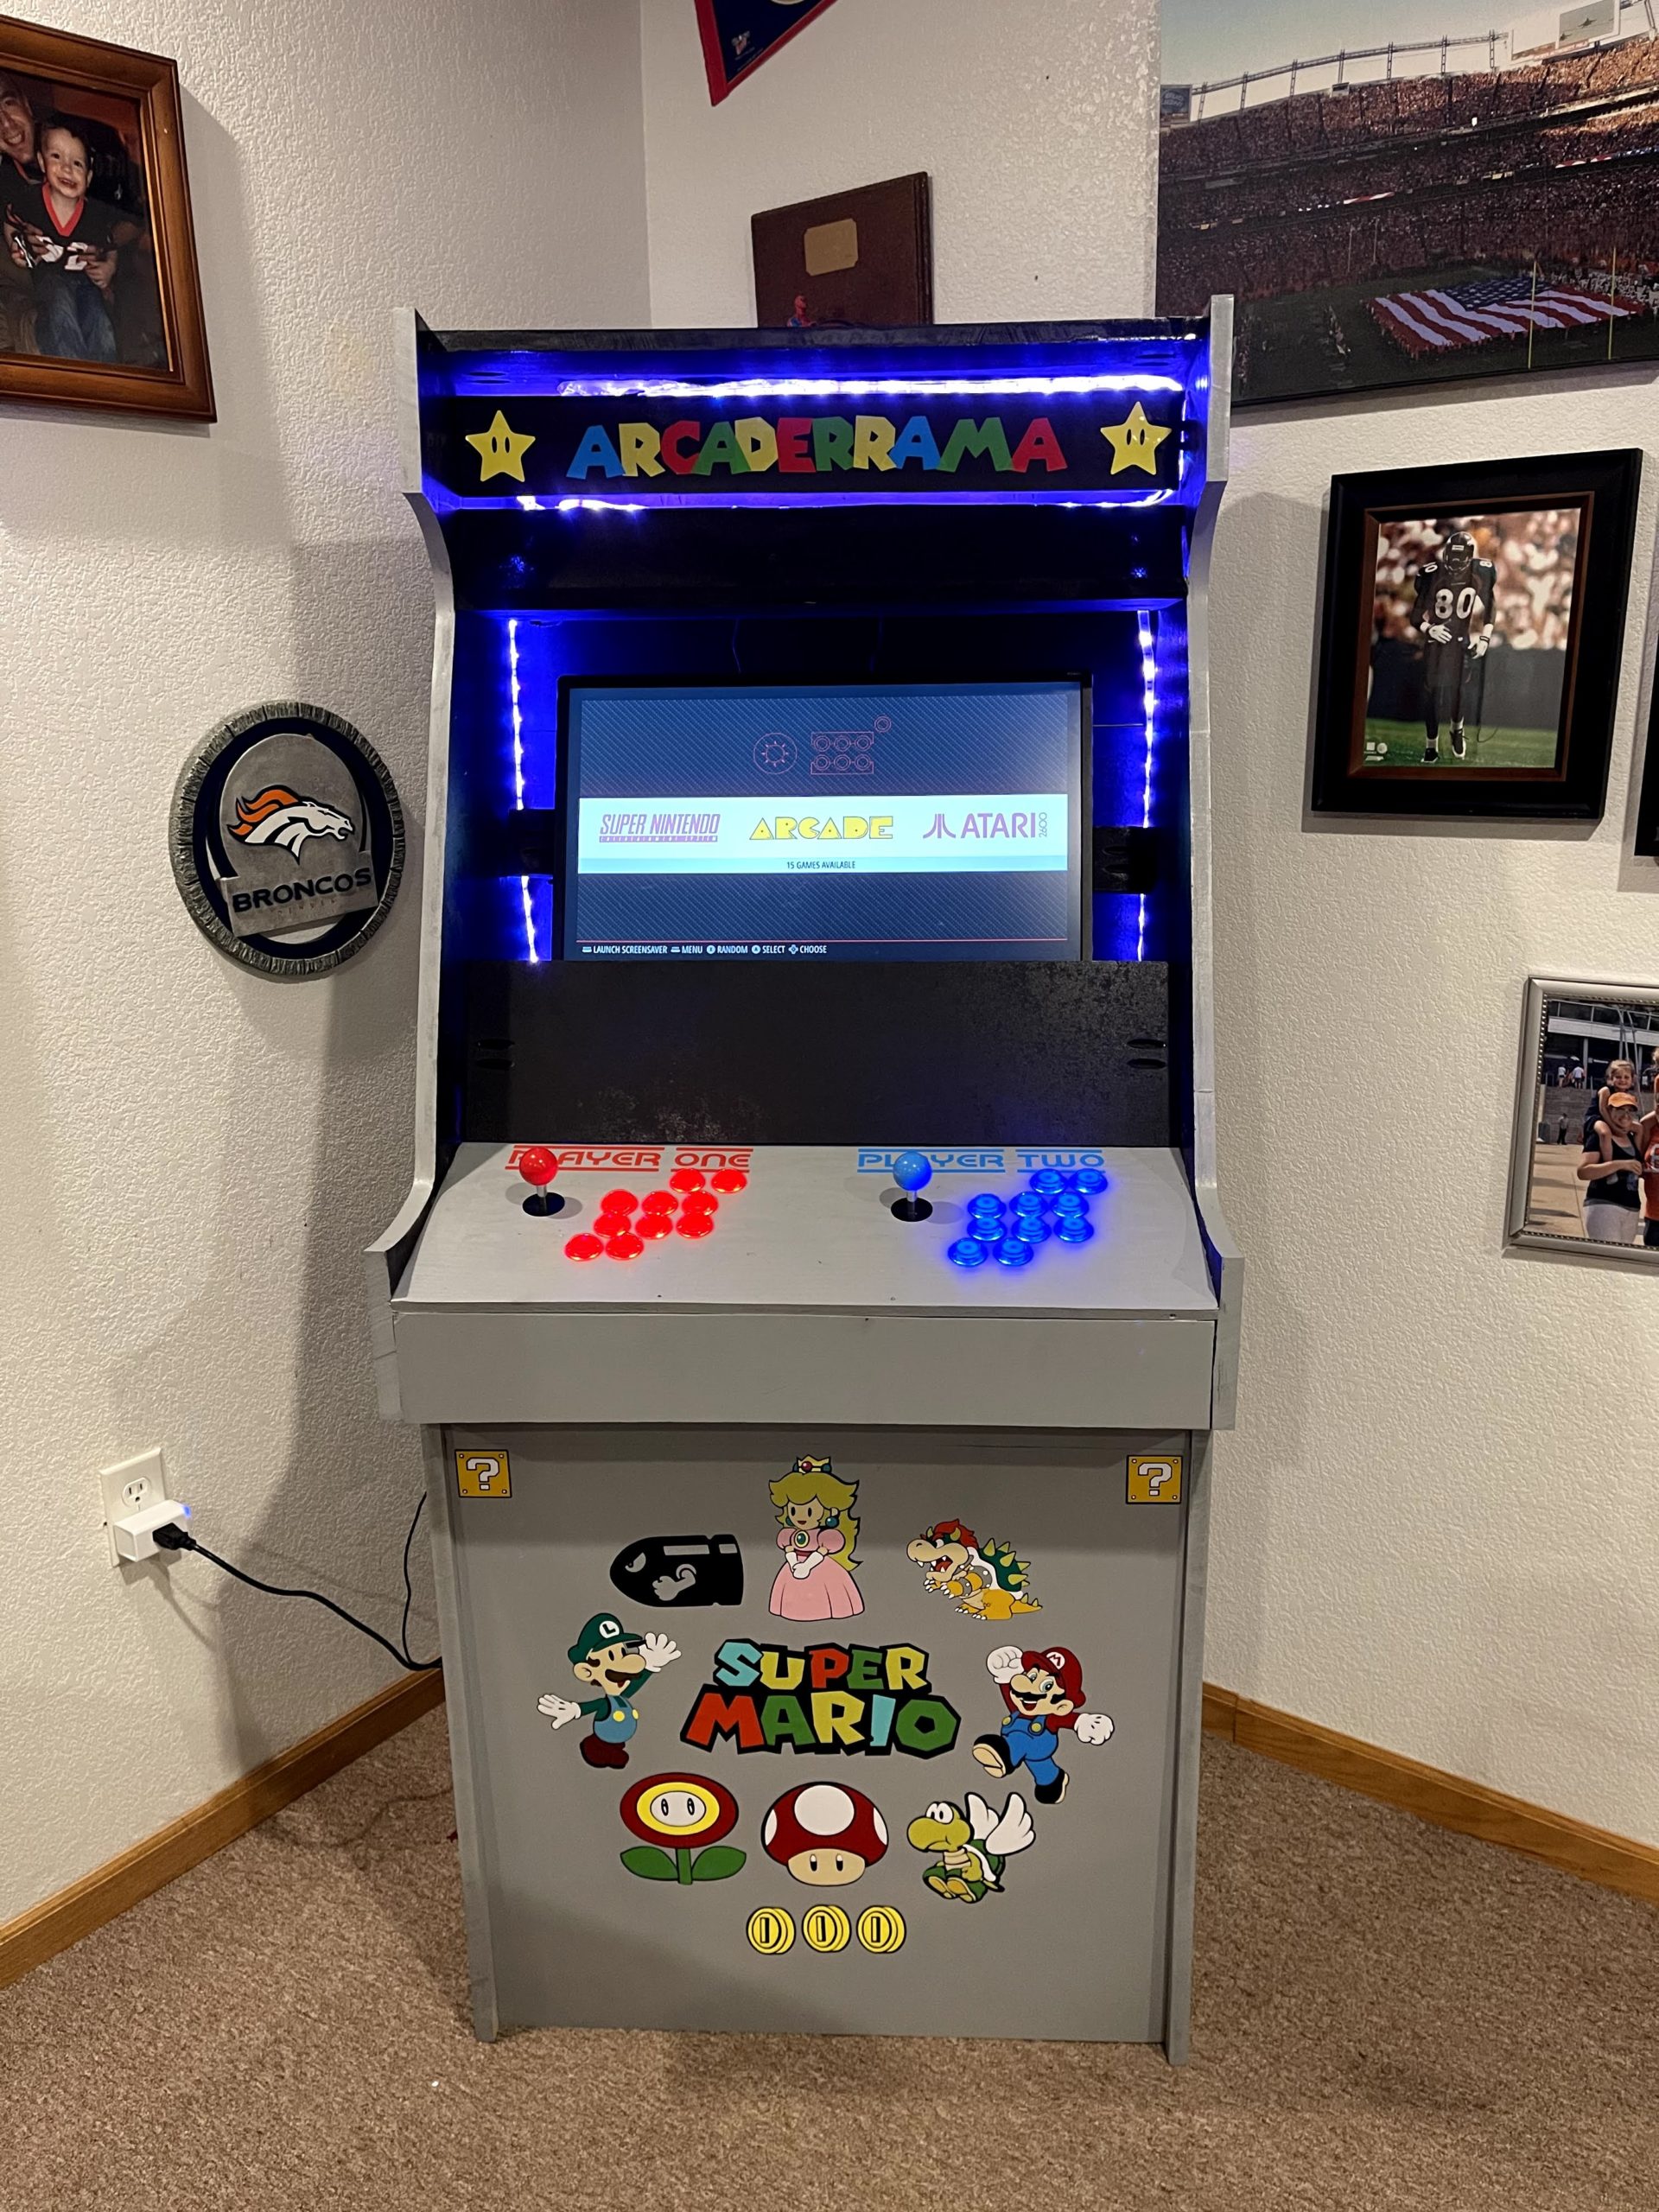
Blessed with beautiful warm weather, we got up and painted the outer casing, going with grey. We ended up spray-painting the interior black to help the monitor blend in. We then put all of the interior panels in. One of the things we struggled with the plans was figuring out the monitor. The plans specified a 27″ monitor, and we ended up using a 24″ monitor but weren’t sure how we were going to secure it. We ended up building an ad-hoc shelf to place the monitor at an angle, then put a piece of backing wood to keep it from tipping too far back. We then added all of the wires, speakers, and lighting. We were finally ready to move it downstairs into the game room and get things running!

We got the monitor placed, the Raspberry Pi hooked up and fired everything up for the first time!

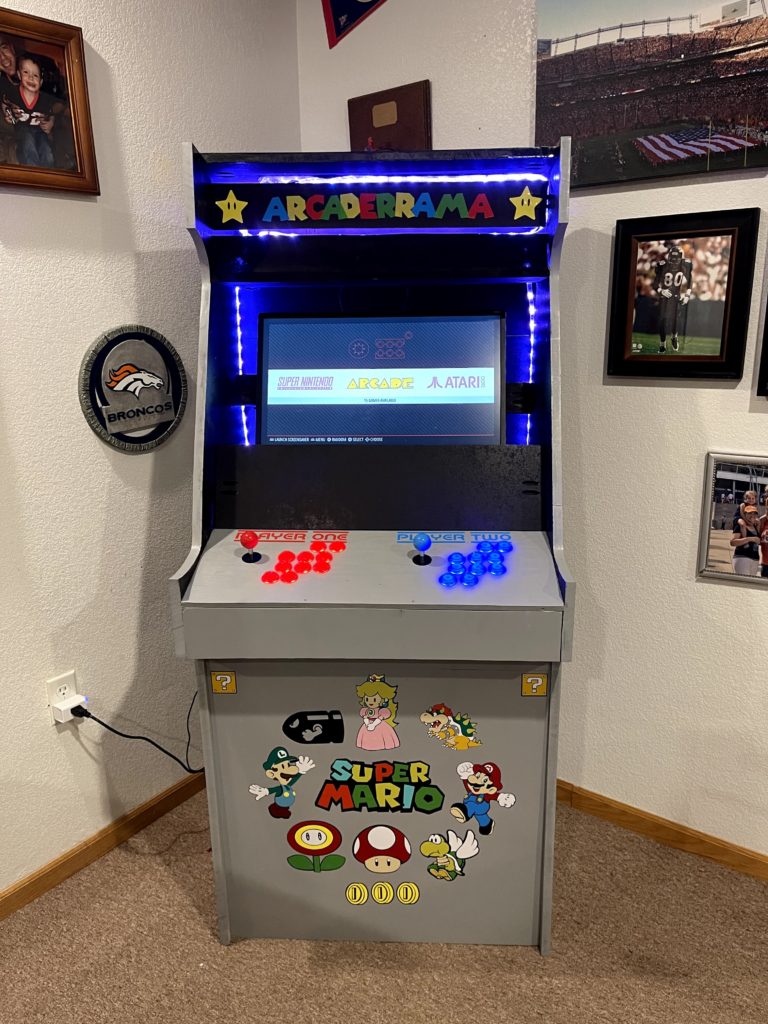
Bethany spent the rest of winter break printing the decals and making the arcade look awesome! Bethany indulged me in printing decals of some of my favorite games, some taking longer than others. We were really excited about how it turned out!

You’re Doing Video Wrong

When a pandemic hits society and forces everyone to retreat into their homes, video technology has transformed from a novelty to a necessity. For the last two months, people are relying on video conferencing, broadcasting, and live-streaming to replace their face-to-face interaction.

In my 20+ year career working in the technology sector, spending the majority of it working in global remote teams, I’ve spent countless hours in teleconferences (and video conferences) and tried many different technologies and methods to collaborate. Watching those around me try to grapple with the same problems at a larger scale has me offering some suggestions about how to approach video in your daily life.

Your video conference likely unnecessary

There’s a dirty secret about video conferencing, especially for work meetings: 95% of them are unnecessary, usually creating more problems than they solve.

I get that many are trying to fill the void left by abruptly ending face-to-face interaction, and video can help, but only to a very short extent. When sitting around a table in a conference room, you’re not looking at everyone in the face simultaneously, yet that’s the experience that a gallery-view video meeting. This backfires on concentration efforts, where participants become far more concerned with their own appearance, surroundings, and demeanor, rather than focusing on the content of the meeting. This is especially true for larger meetings.

Unless it’s critical that you get non-verbal feedback to your meeting content, keep the camera switched off. While the risk exists that there may be more multi-tasking (which is a fancy term for “not listening”), it’s part of the reality of remote meetings. You’ll also be grateful that meeting attendees can manage their distractions on mute, especially if you have parents with their kids at home. As a presenter, you do get a sense that you’re yelling into an empty cavern without much feedback, but it will feel better over time.

The other important consideration for video is bandwidth usage. With many working from home right now, household bandwidth usage has grown significantly. Your video conference may be clogging the internet pipes in your own house, as well as in your community. Especially if you’re challenged for bandwidth, you may be better off just keeping that camera turned off when you can.

Use a headset if possible

If you’re going to be home for the foreseeable future, invest in a USB headset if you can, or if you’re doing a lot of one-way video lectures, a decent USB mic would do as well.

Having a headset will not only make the audio better on your end (blocking out background noise), but it also improves your listening experience as well. When I was on teleconferences in a crowded office I bought this gaming headset that completely covered my ears, eliminating the background noise.

You might get some comments about looking goofy on video, but your coworkers will secretly thank you for the decent audio, and may even be secretly jealous.

If you’re a musician and looking to do live-streaming, the best thing you could do to stand out has decent audio, especially if you’re going to be playing something louder than an acoustic guitar. If you happen to already have a Shure SM-58 (or another vocal mic), investing in an audio interface would take the inputs from your microphones and port them to your computer, giving a superior audio experience.

Lights and your camera

If you’re lucky enough to have an abundance of sunlight and windows where you work, be mindful of where they’re positioned in relation to you and your camera. Avoid having the windows and sunlight to your back, as the lights are going to wash you out. Ideally, you want the light source to be behind the camera, or lighting you from off to the side so that your face can be the brightest object on the screen. It may be necessary to turn off your background lights as well.

There are the fancy LED rings and studio lights (which are in short supply right now), but the reality is that even a desk lamp placed correctly would be sufficient for most people.

Streaming vs Hosting – it’s not either/or

I’ve seen a lot of people doing live streams on Facebook, from musicians to fitness classes, to public institutions. Facebook does make it easy to Livestream, especially if you’re using a mobile device, and it also rewards you by prominently showcasing your video in everyone’s feed. As nice a job Facebook is about live streaming, it’s awful about rebroadcasting and archiving your video. If you have a fitness class, for example, their interface makes it pretty hard to find the video, burying it deep in your page.

Facebook is also the most draconian about copyright claims. If you are playing music in the background of your video, YouTube will try to identify copyright holders and get them compensated. Worst case, you won’t be able to monetize your own video. With Facebook, however, that same music will get your video taken down, as they aren’t equipped to compensate copyright holders.

The fix is easy: if you Livestream on Facebook, great – but be sure to download the video and upload it to your YouTube channel as well. I would condition people to also go over to YouTube as well. YouTube will reward you (socially and maybe even monetarily) far more than YouTube will, plus you have a place you can refer people to outside of Facebook. If you’re doing something where you’re trying to build an audience, use an email list service like Mailchimp to correspond with them.


Ultimately it’s important to remember that each situation is different and it is easy to go overboard depending on what you’re looking to do. If you’re looking to dip into live streaming or giving long-form video lectures, your level of investment may be more than someone who is just doing a weekly video checkpoint for school. While streaming video is an incredible tool, it’s also most effective when used sparingly.

Do you have any video tips? I’d love to hear them in the comments!