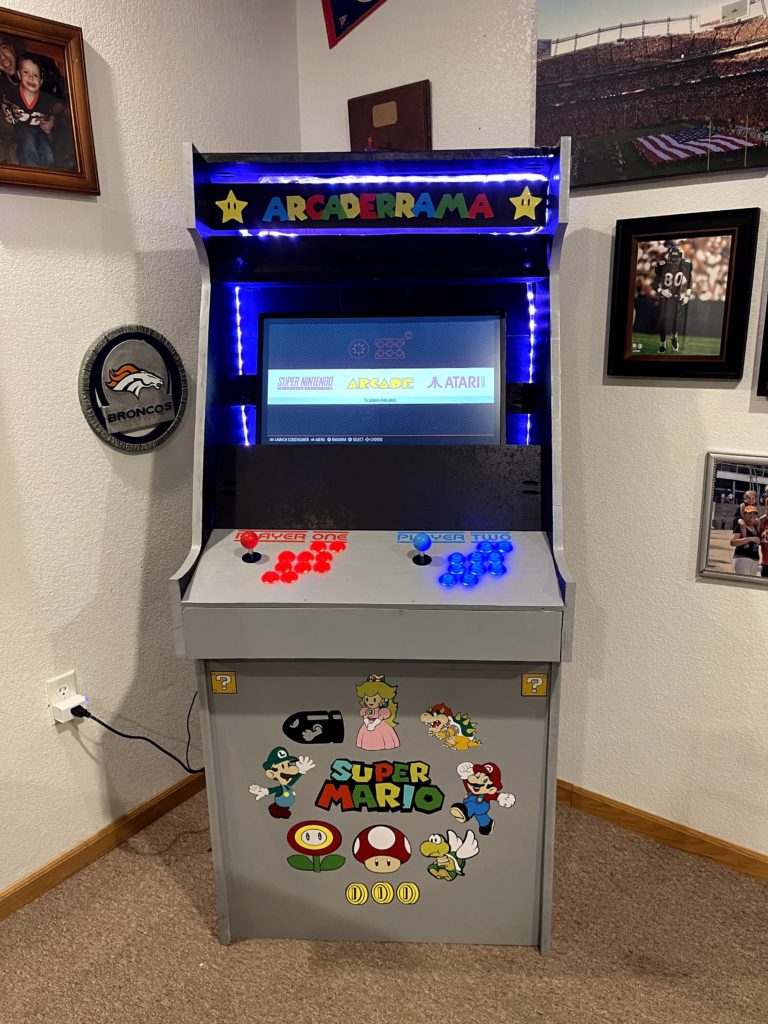
Our Winter Break Project – A RetroPie Arcade
This has been quite a different winter break for us, hunkering down and lying low for Christmas and New Years’, but we found the perfect project to keep our family busy – constructing our own arcade cabinet! I’ve had RetroPie loaded onto my Raspberry Pi hanging around for three years, but we thought this would…